Complete step-by-step platform onboarding documentation — from registration to your first login.
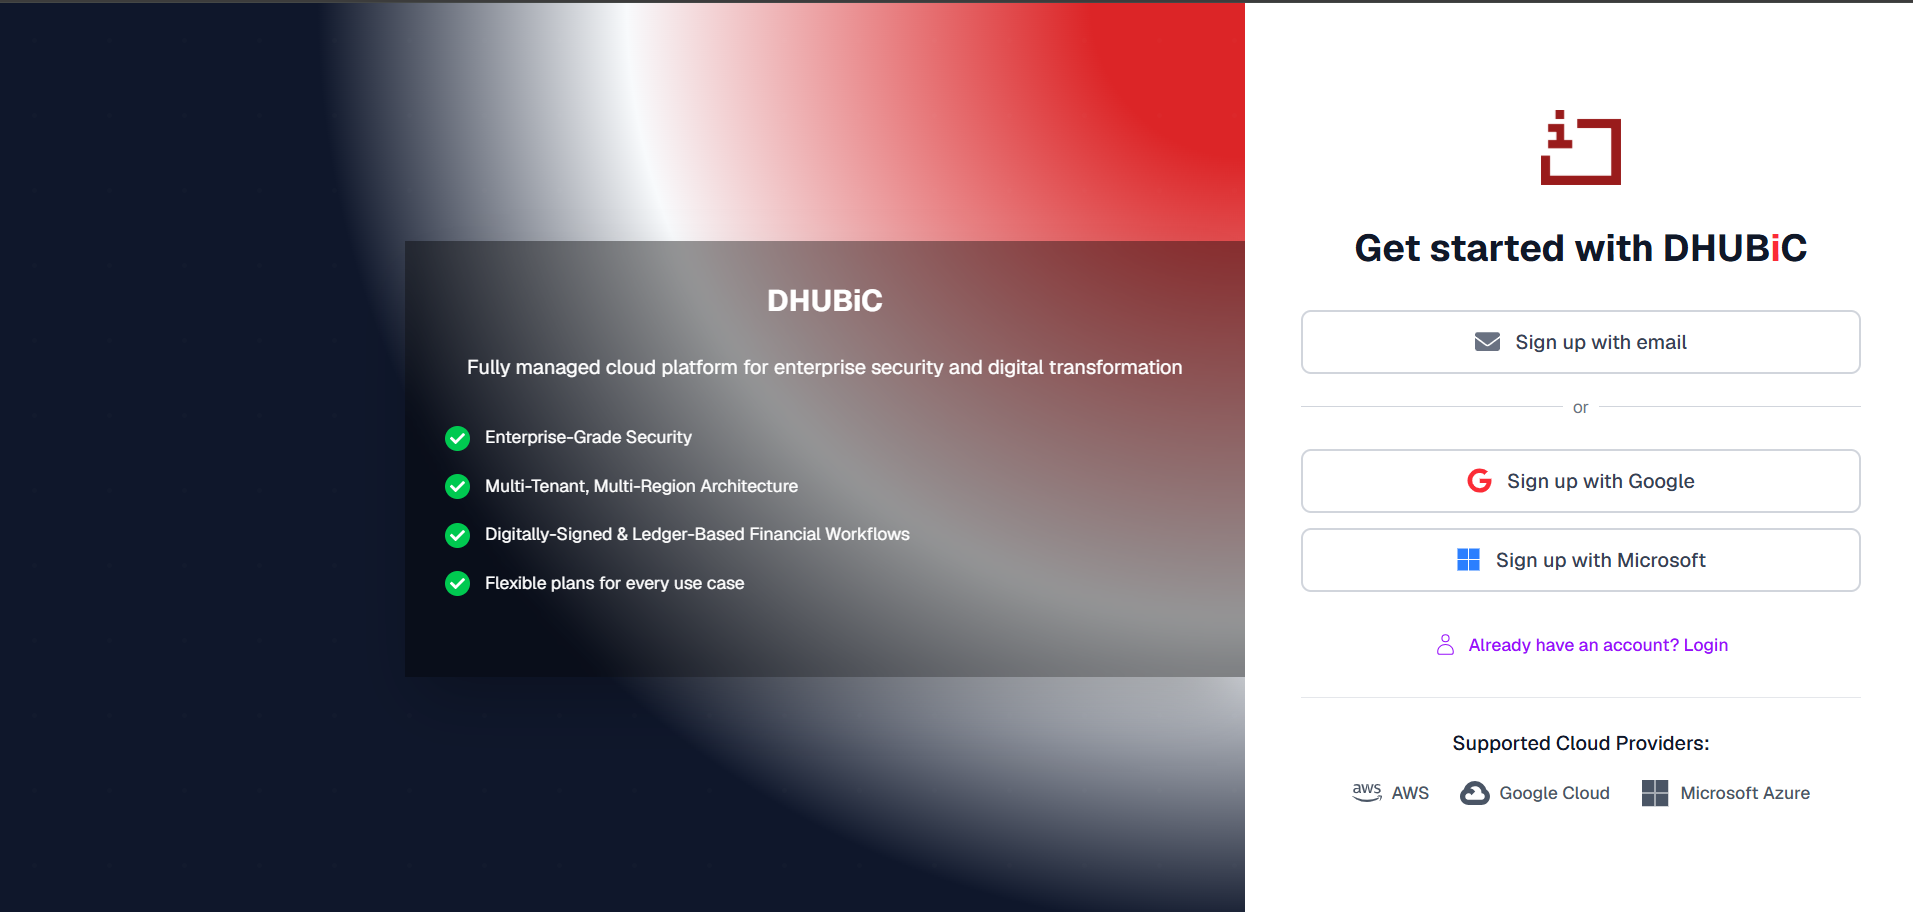
Navigate to the DHUBiC registration page (staging.dhubic.com/accounts/register). Choose your preferred sign-up method from the following options:
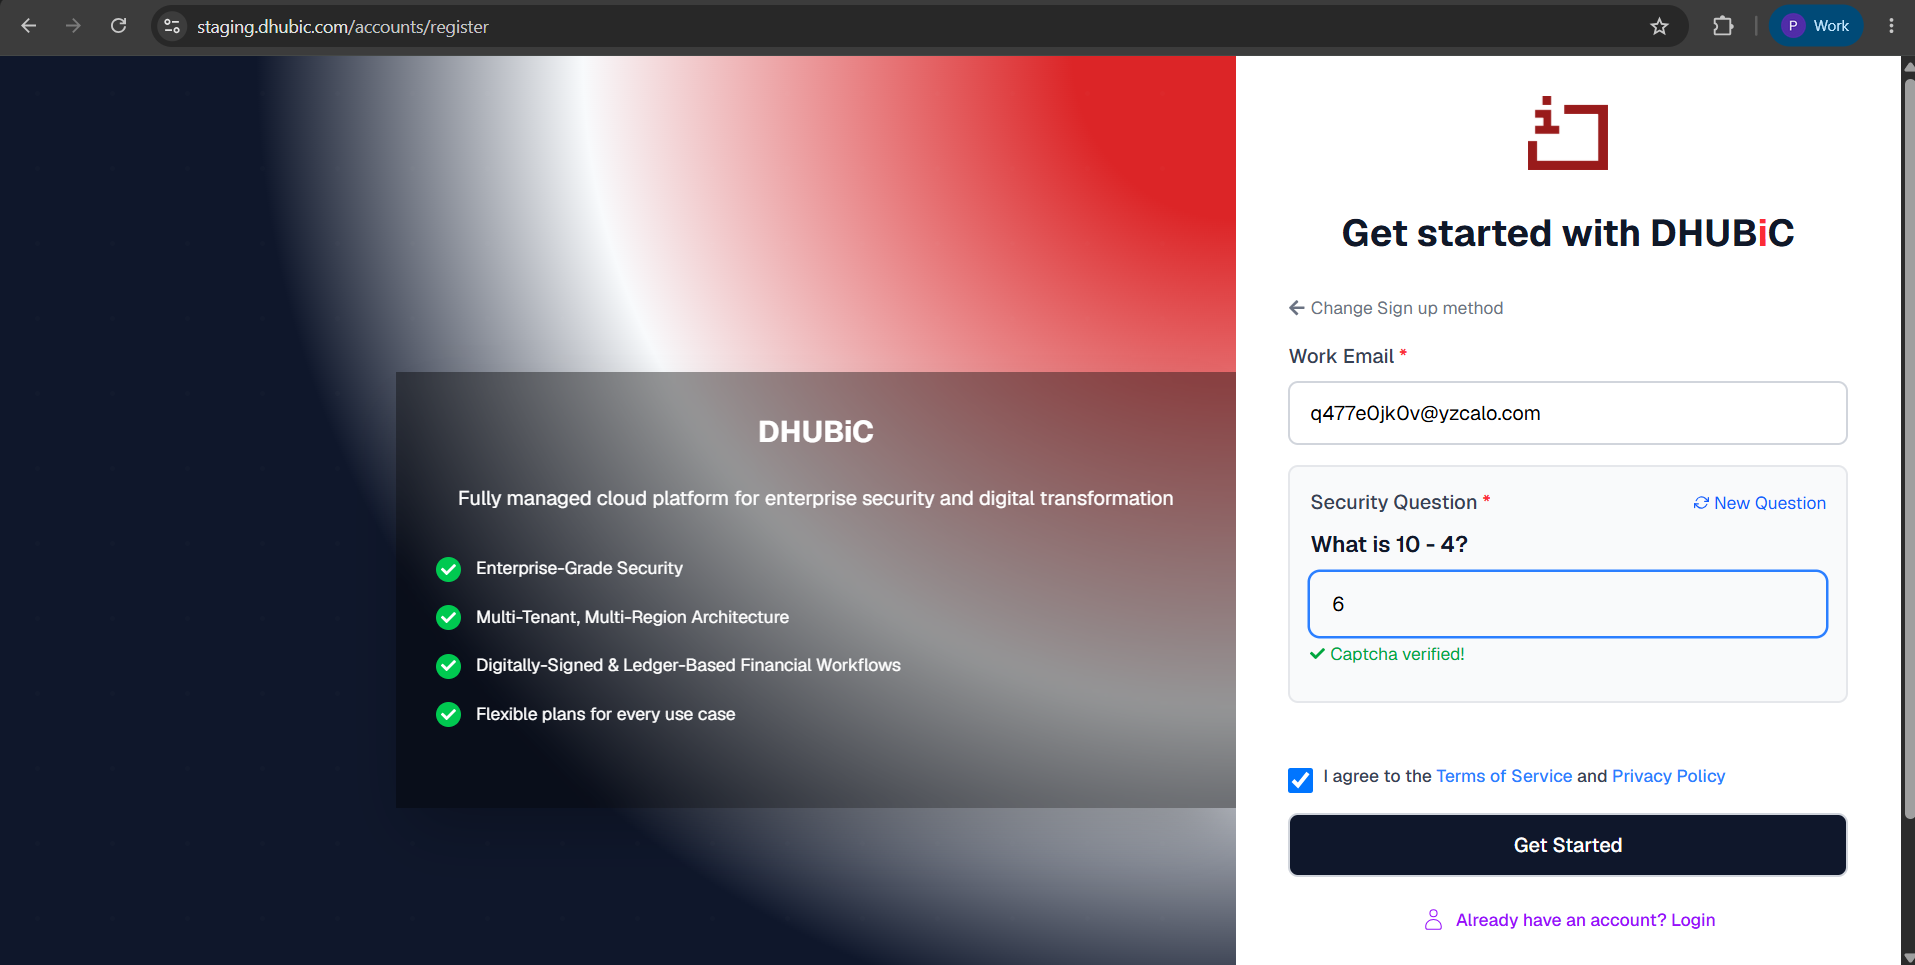
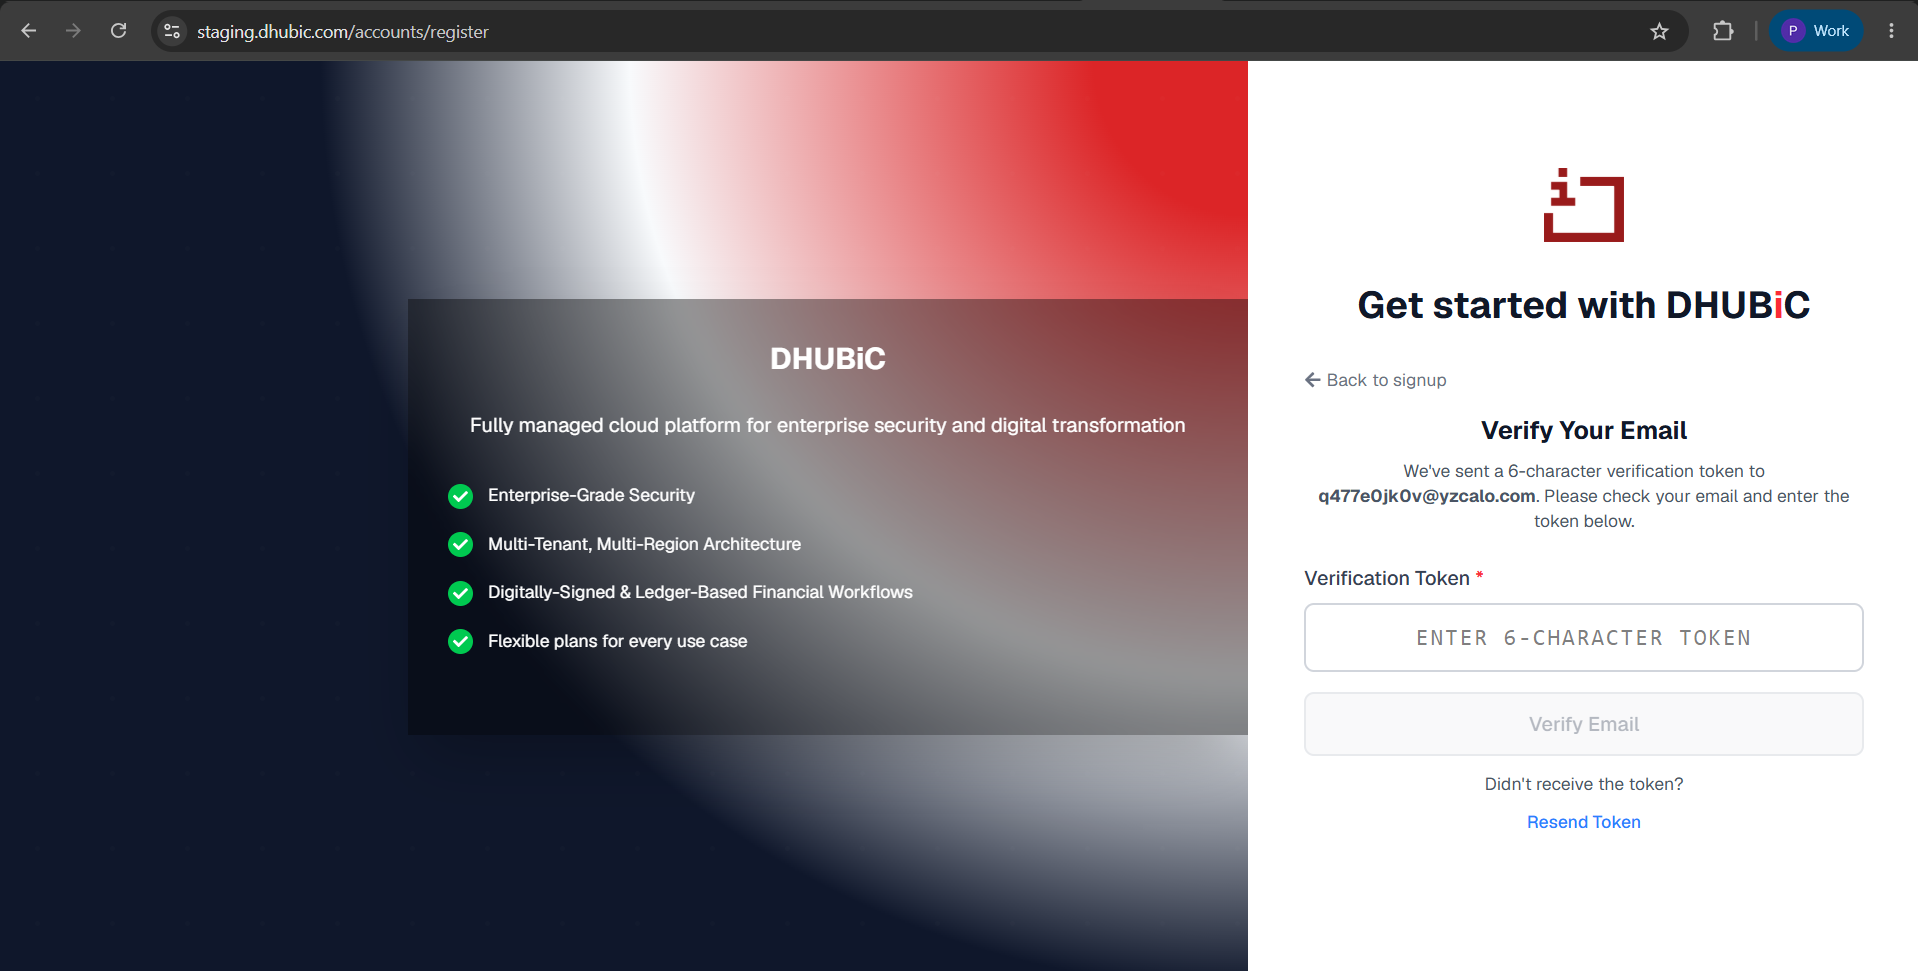
The screen will refresh to the 'Verify Your Email' page. The system prompts you to enter a 6-character verification token sent to your registered email address.
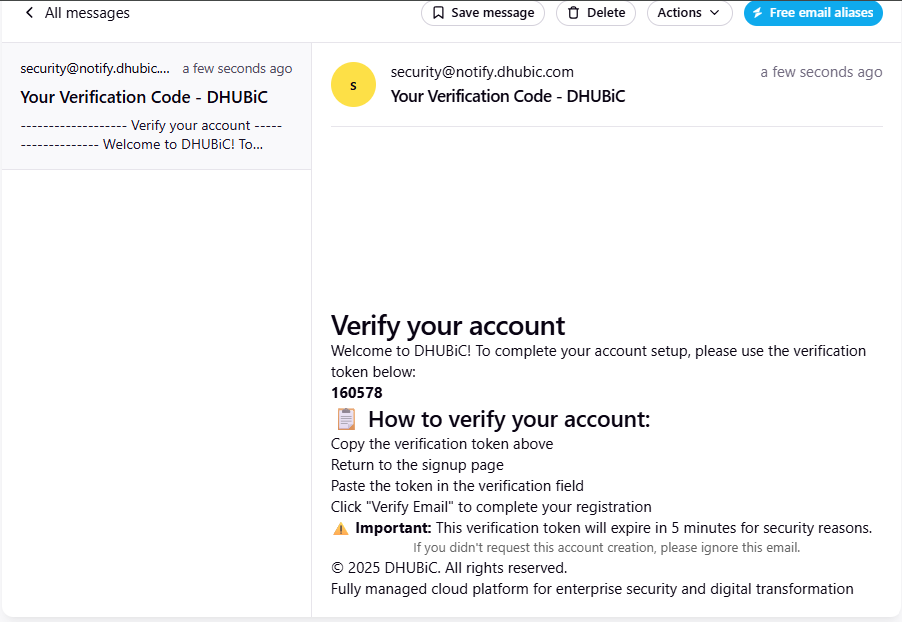
Access your email inbox and open the message from security@notify.dhubic.com with the subject 'Your Verification Code - DHUBiC'. Locate and copy the highlighted 6-character verification token (e.g., 160578).
Note: This token is time-sensitive and expires within 5 minutes for security reasons.
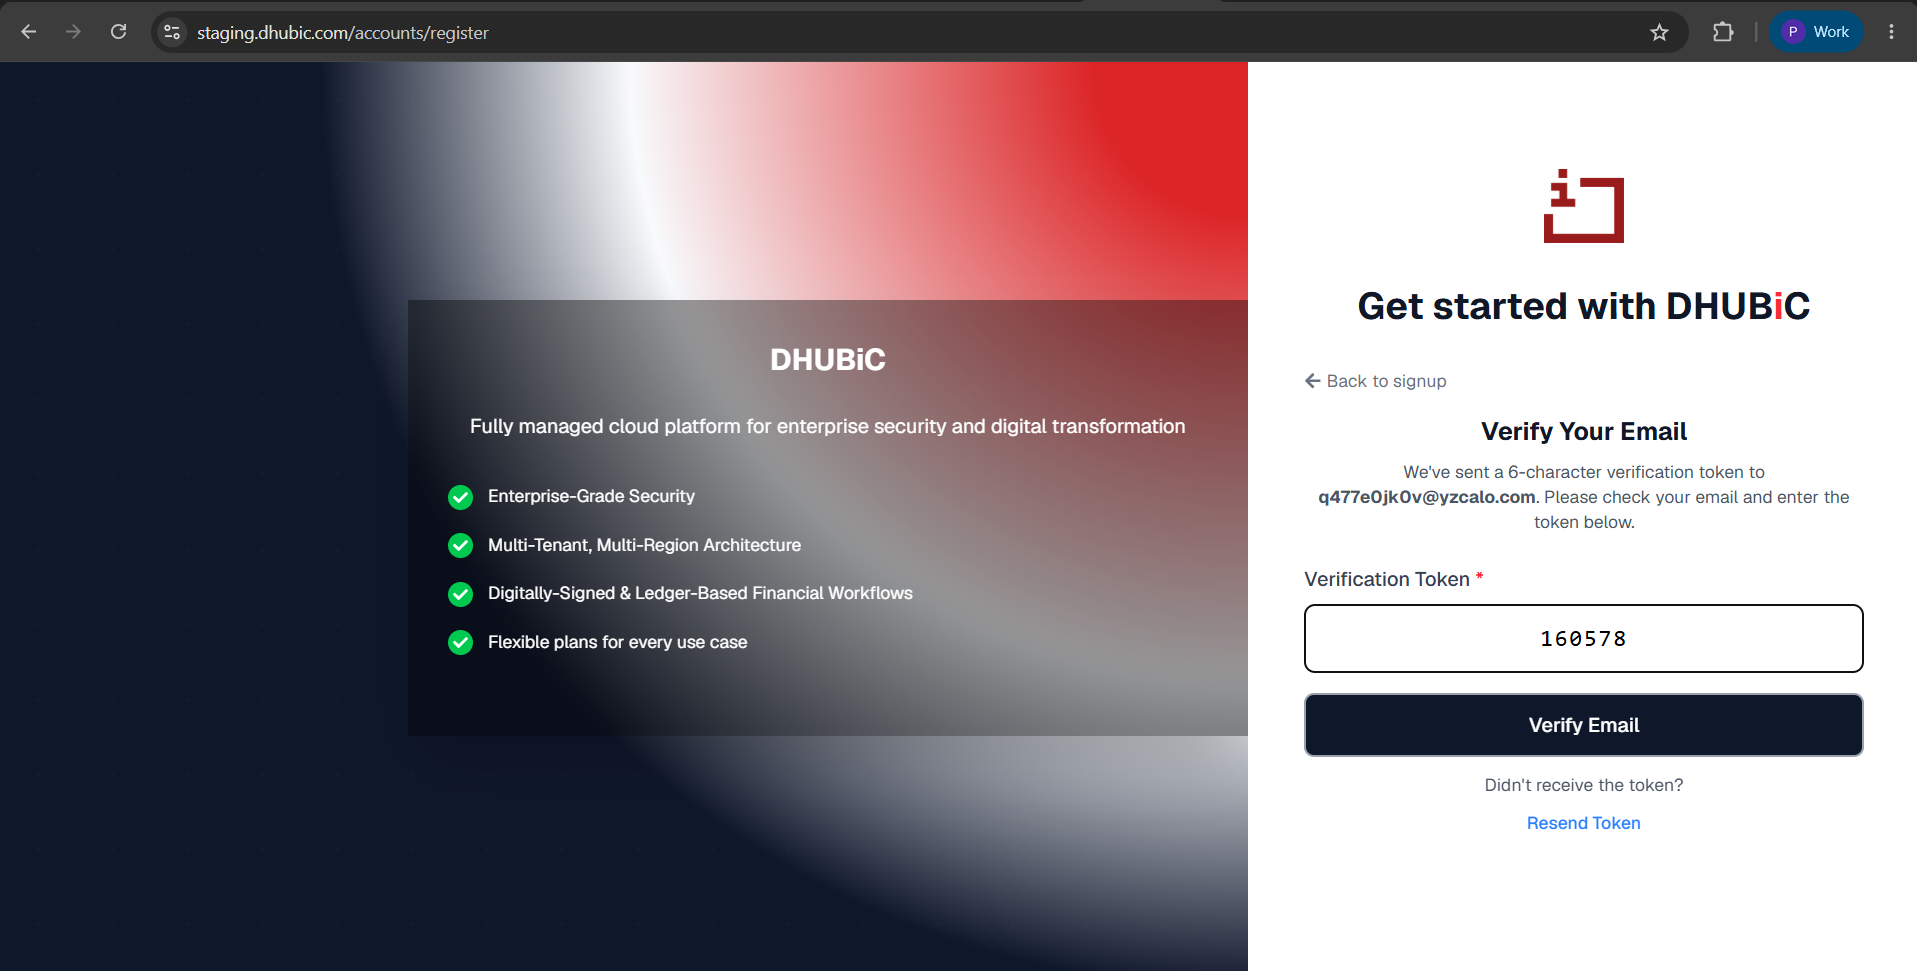
Return to the DHUBiC verification page, paste or type the 6-character code into the Verification Token field, and click Verify Email.
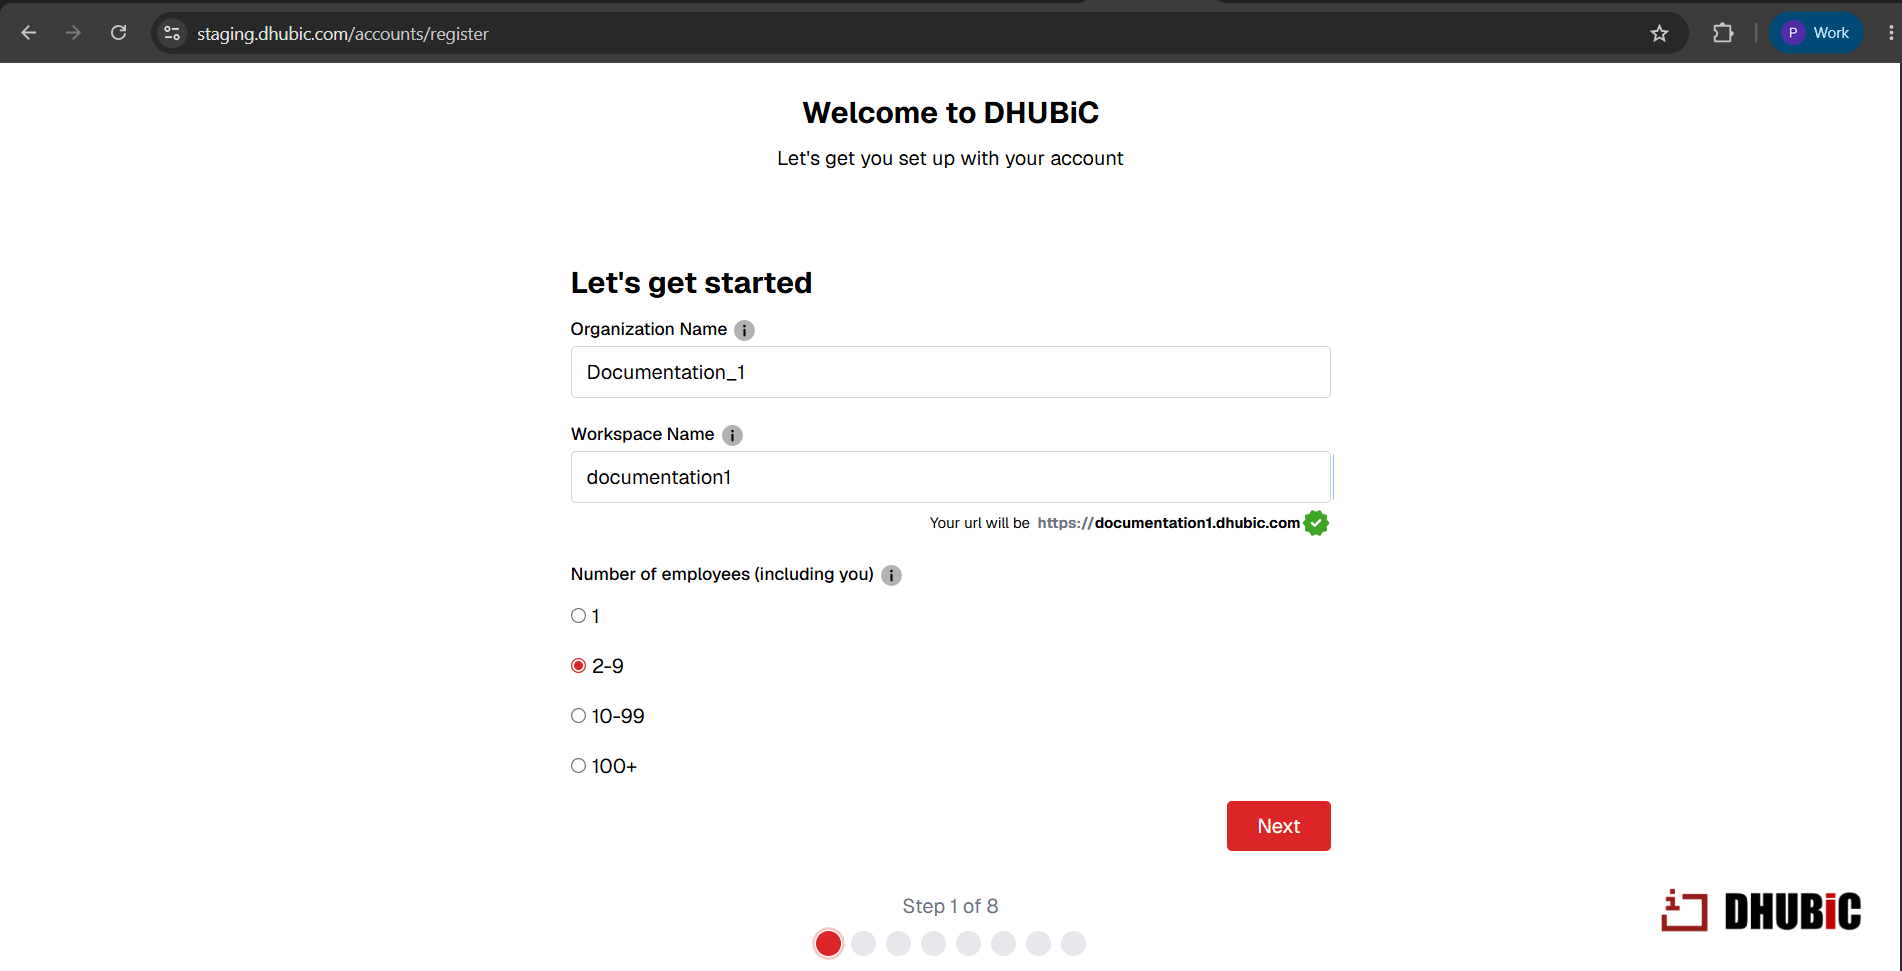
On the 'Let's get started' screen, configure your initial workspace settings:
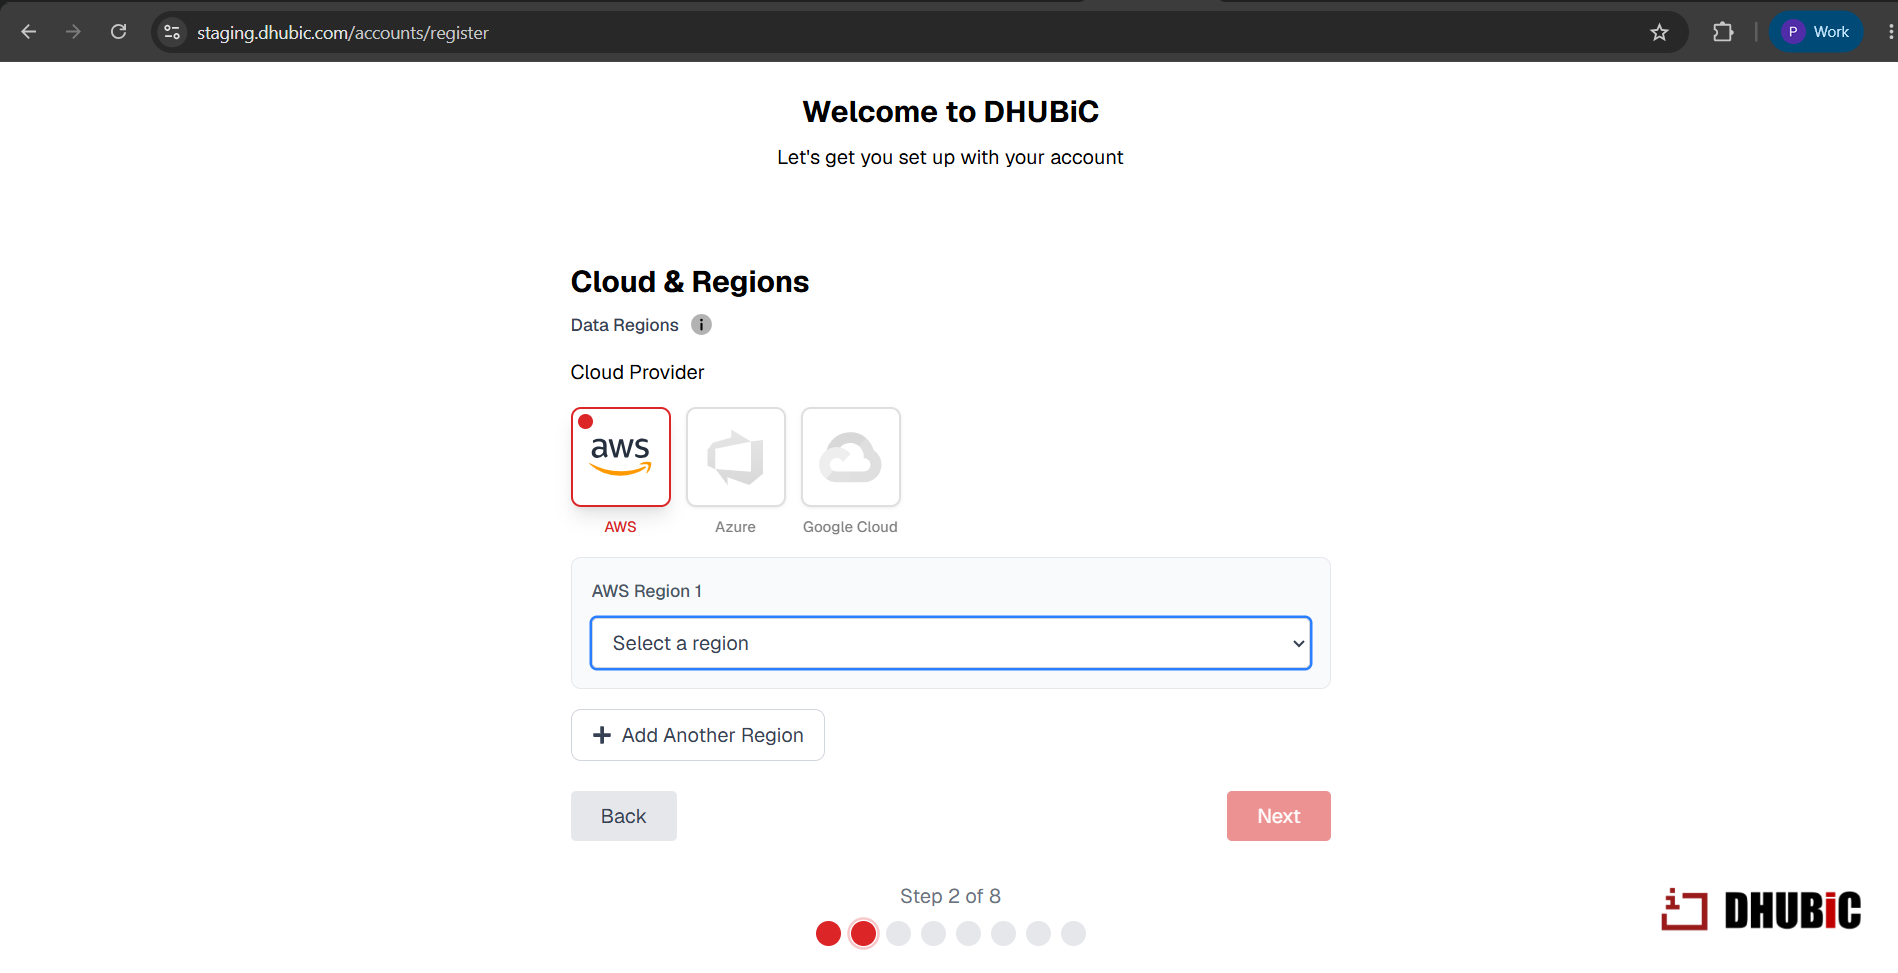
Select your preferred Cloud Provider card (AWS, Azure, or Google Cloud).
Note: The Next button will remain faded/disabled until a valid data region is selected from the dropdown menu.
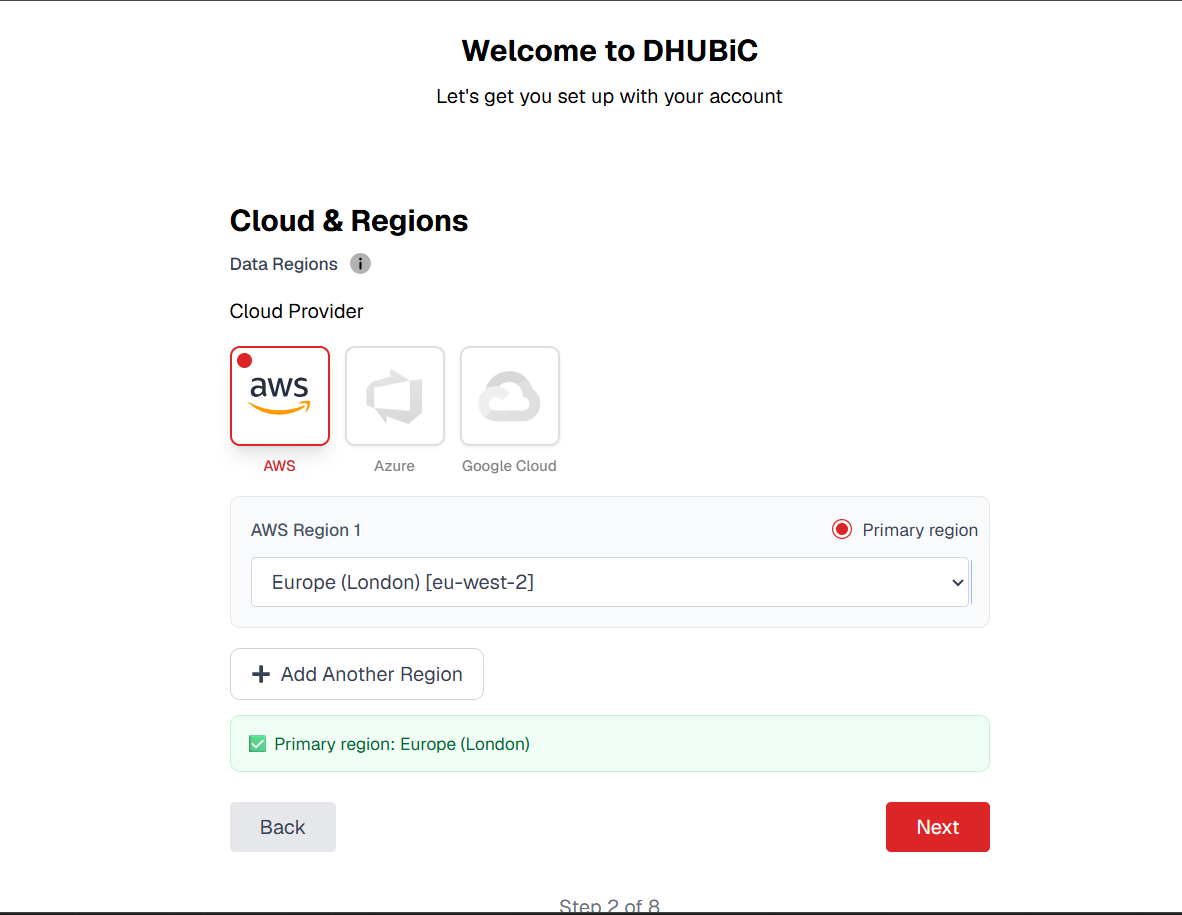
Choose your primary region from the AWS Region 1 dropdown menu (e.g., Europe (London) [eu-west-2]). A green confirmation banner will appear confirming your selection. Click Next to proceed.
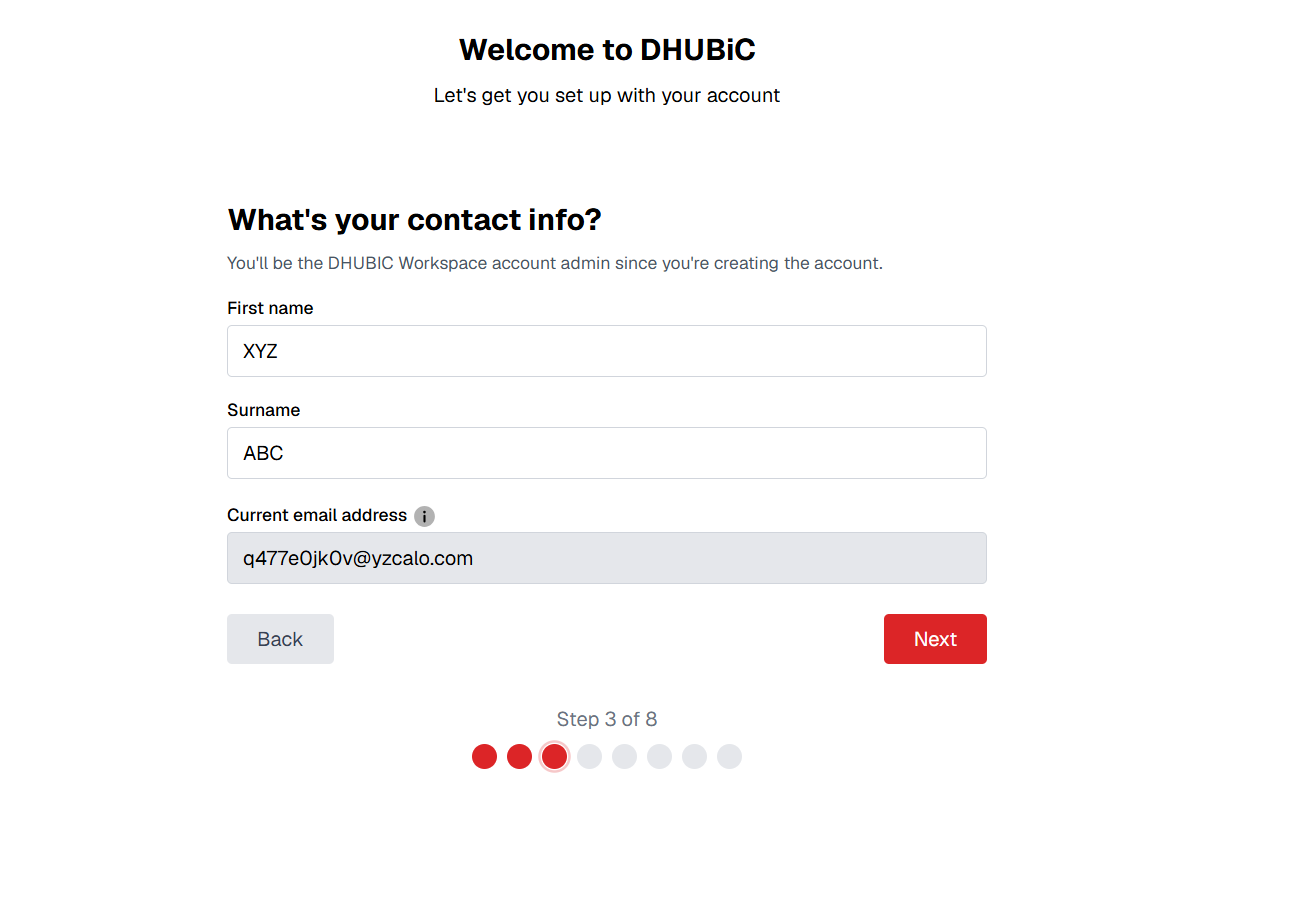
Provide the primary account administrator details:
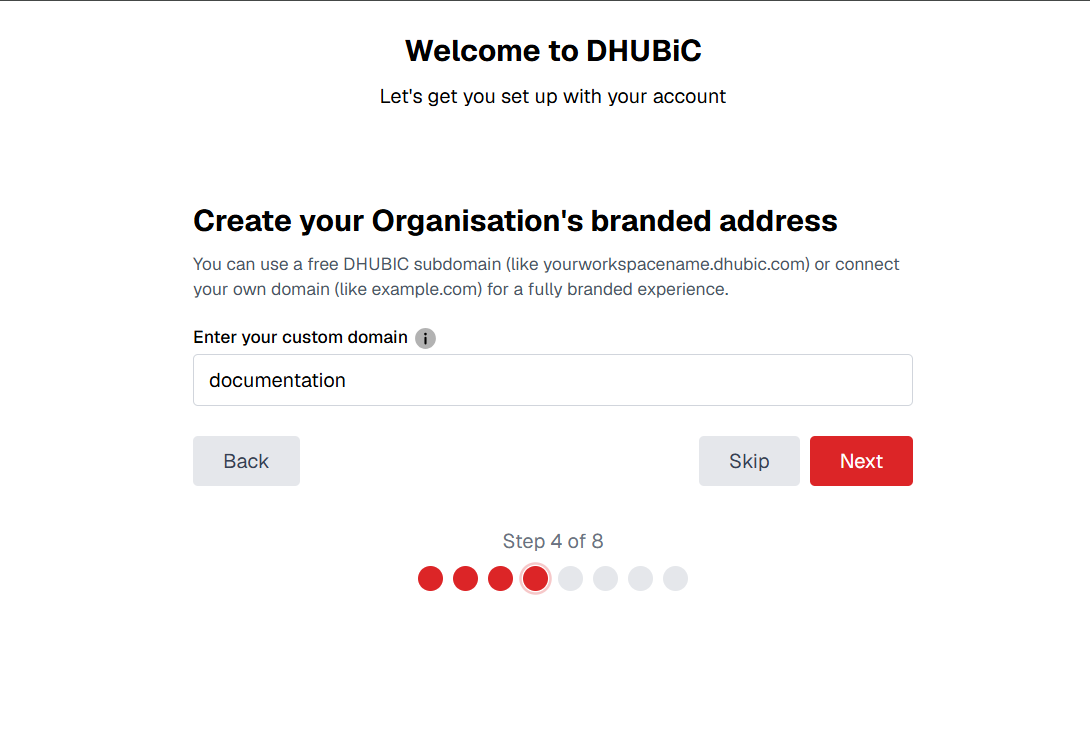
Enter your organization's custom domain name if you wish to connect your own branded domain instead of using the free DHUBiC subdomain. Click Next to apply it, or click Skip to bypass this step.
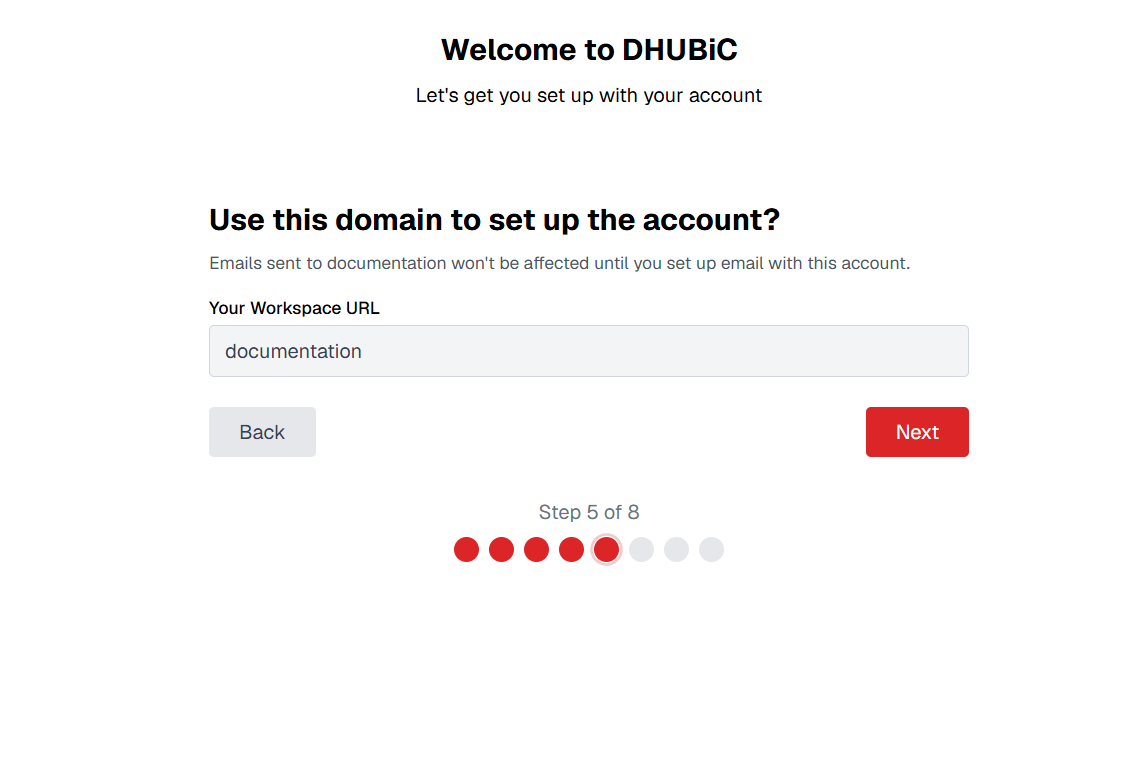
Confirm the base URL domain name for your new workspace. The 'Your Workspace URL' field will display your chosen name. Click Next to proceed.
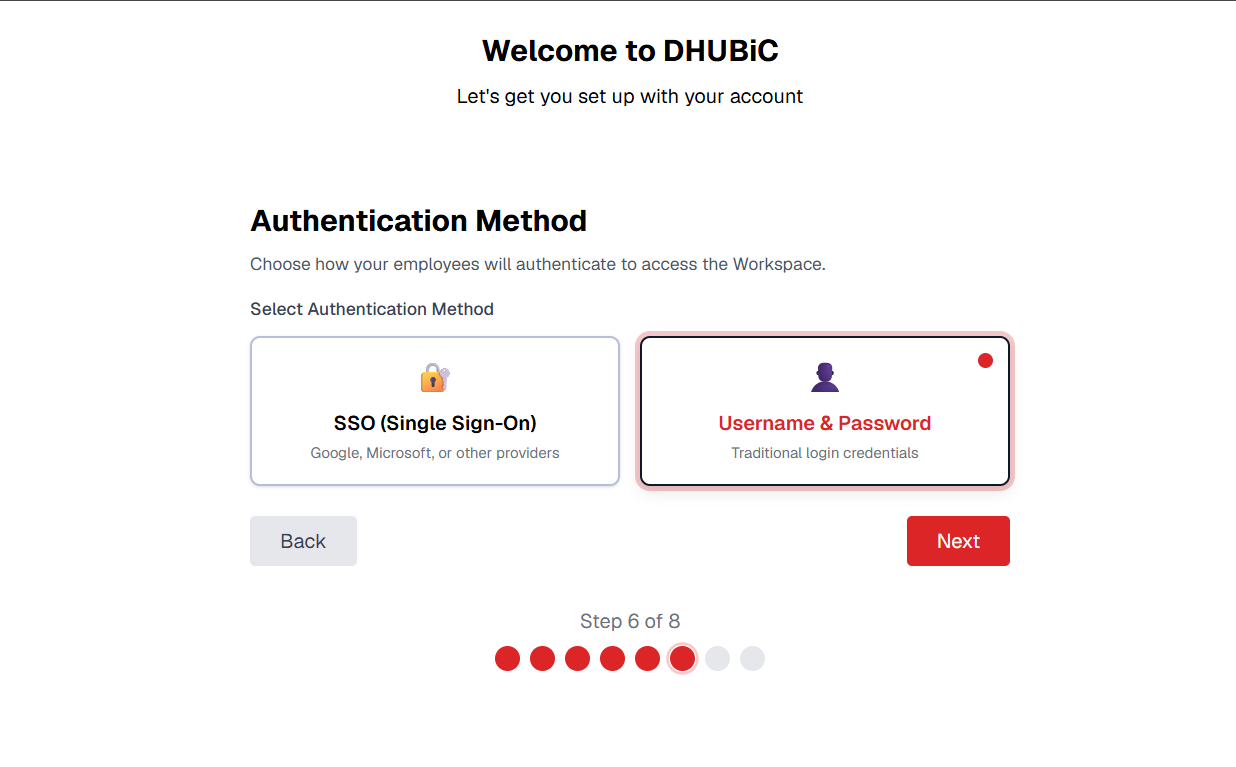
Select how users will log in to this workspace:
Select Username & Password (indicated by the red selection dot) and click Next.
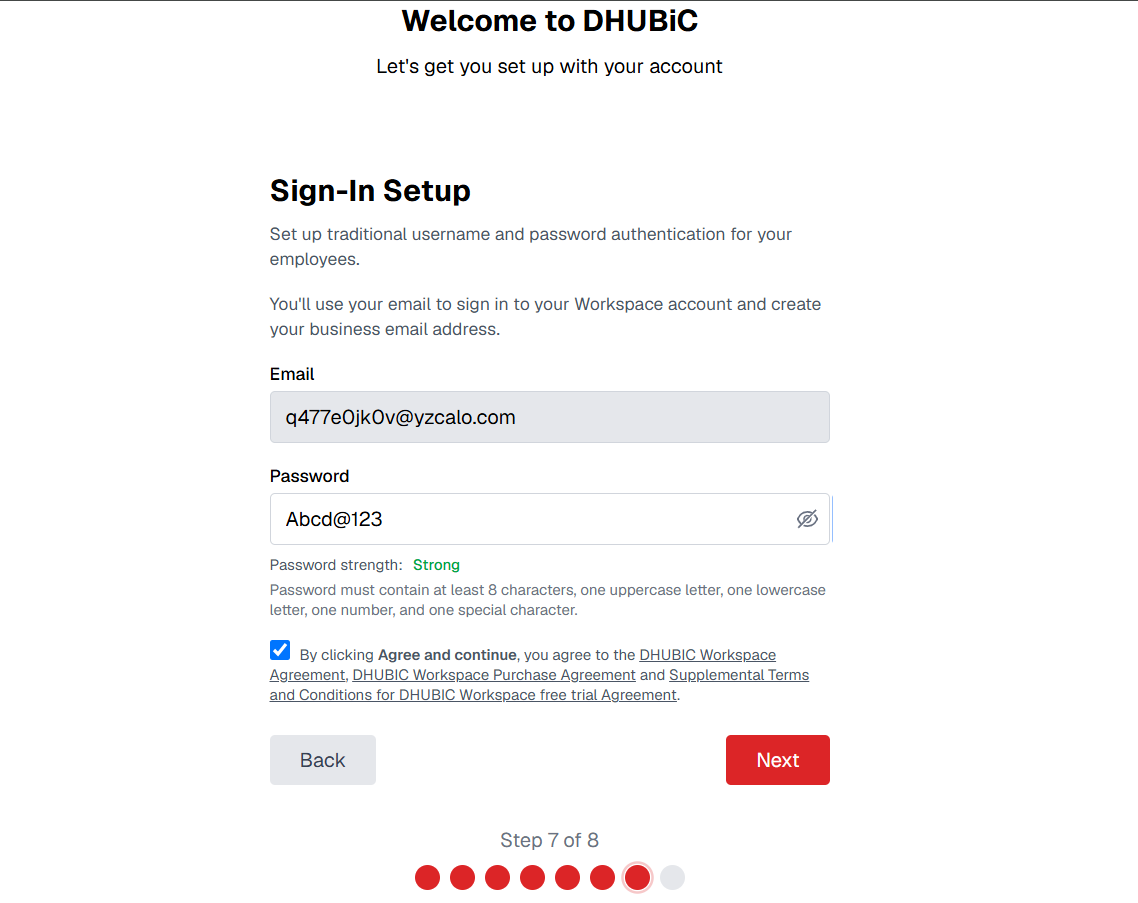
Set up the primary administrator account credentials:
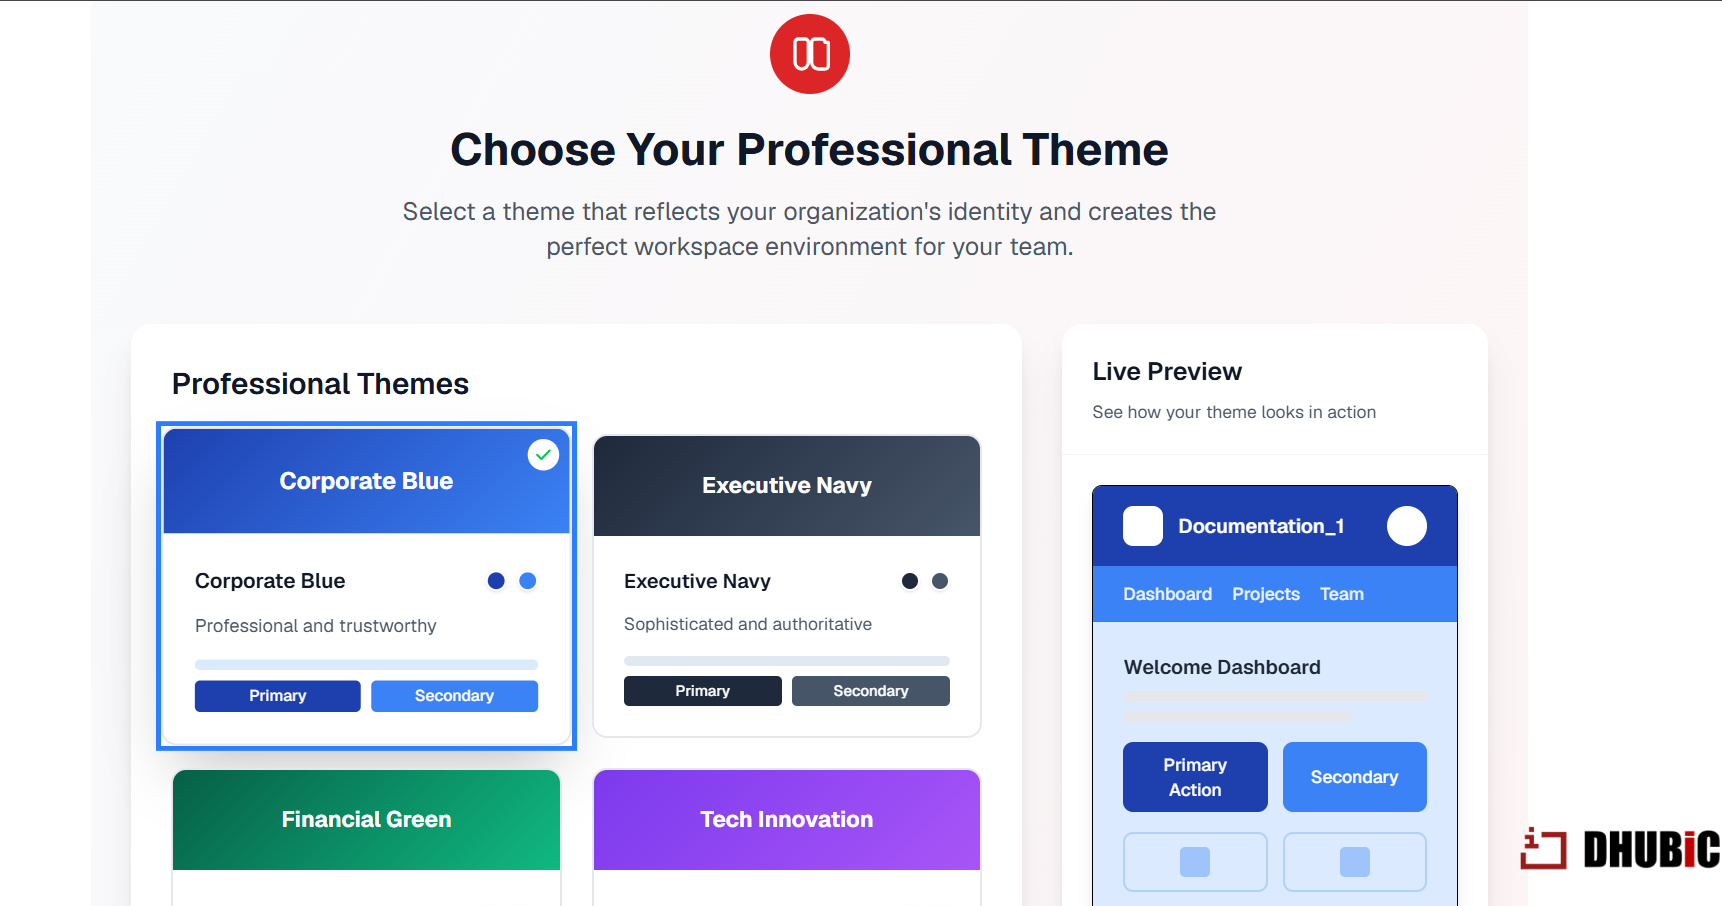
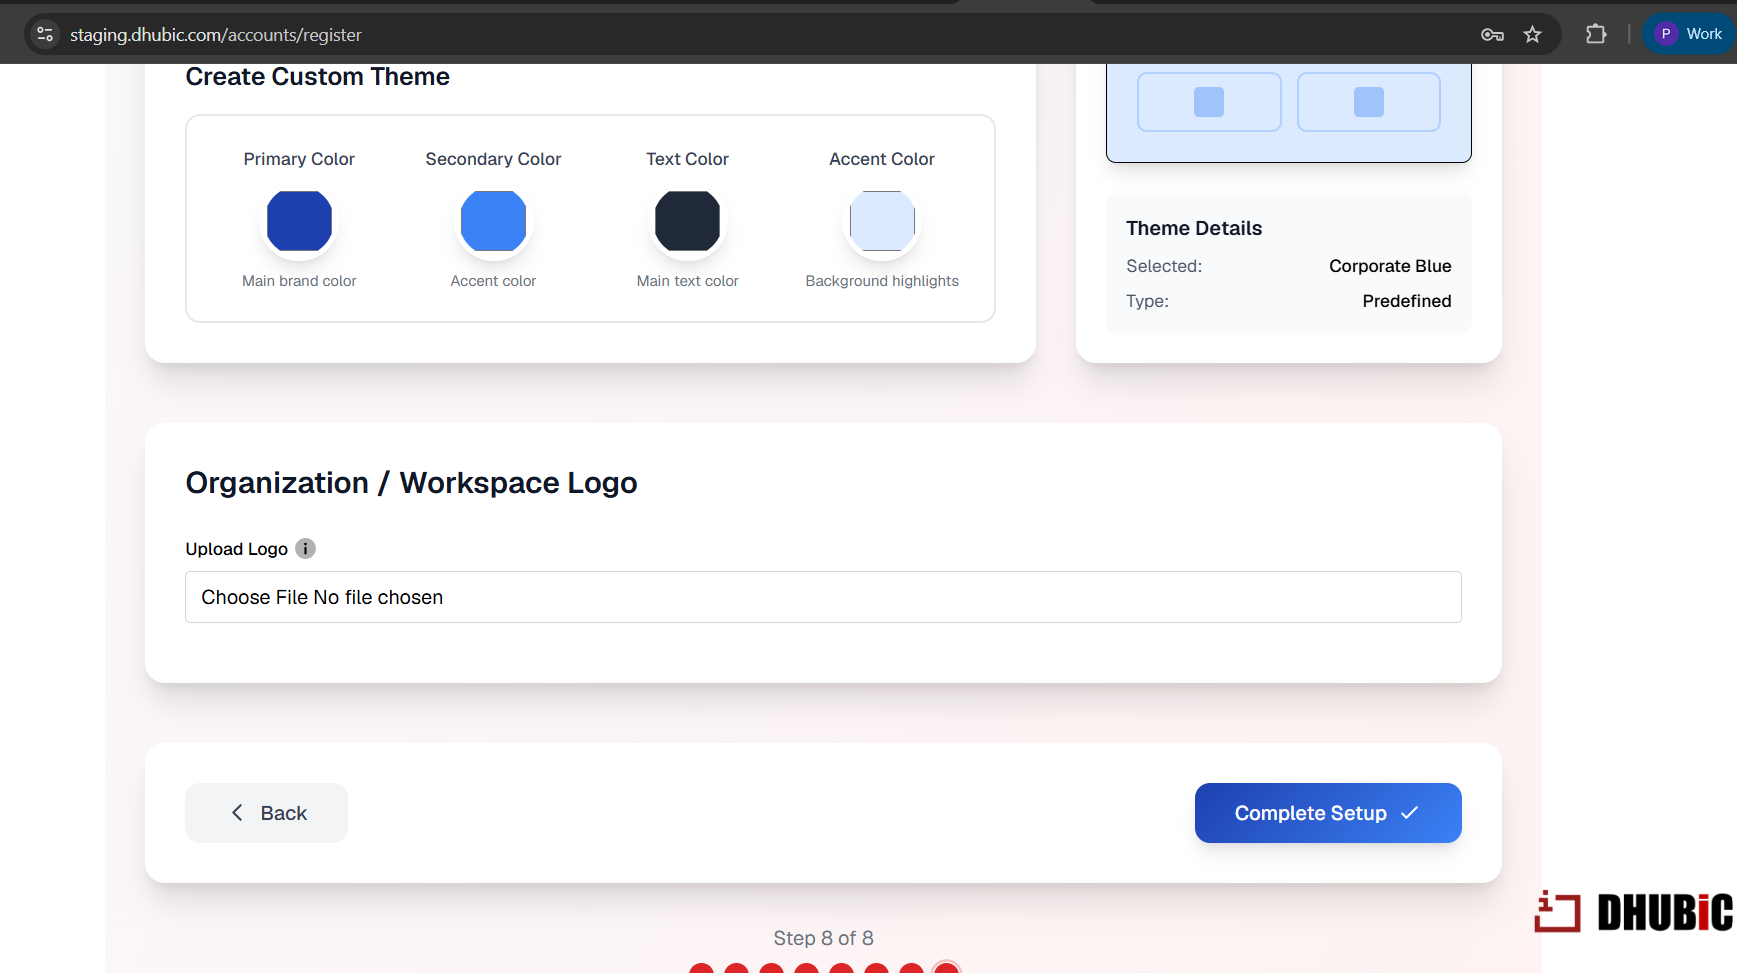
Personalize the look and feel of your enterprise environment:
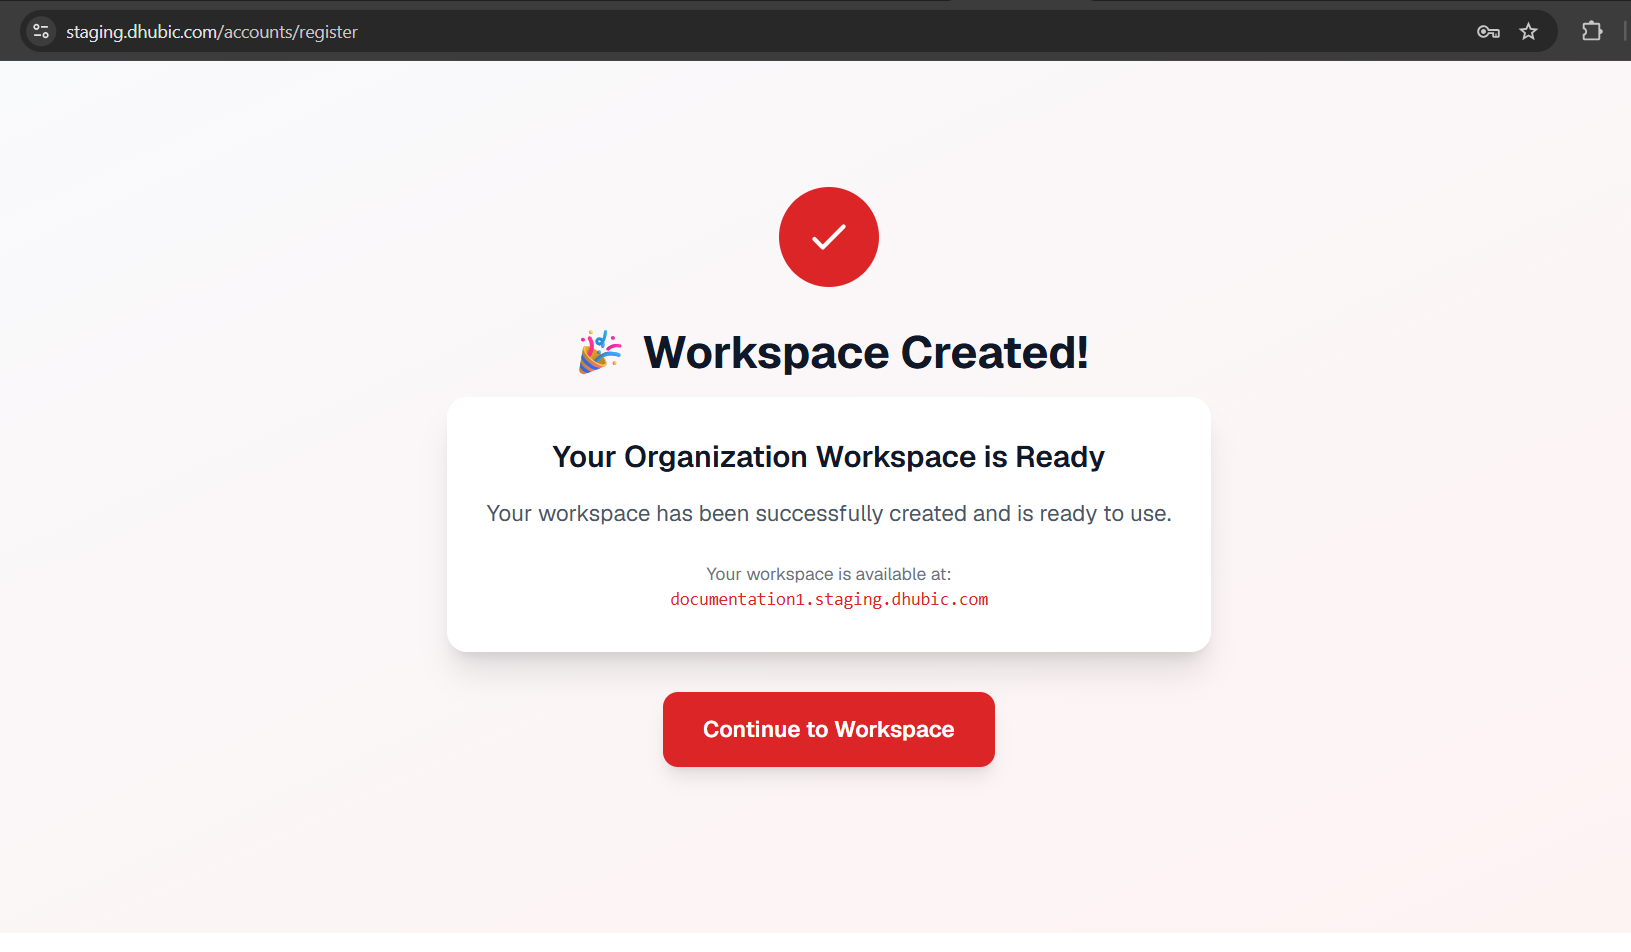
A success screen confirms that 'Your Organization Workspace is Ready'. Take note of your unique workspace access URL (e.g., documentation1.staging.dhubic.com). Click Continue to Workspace to transition to the login page.
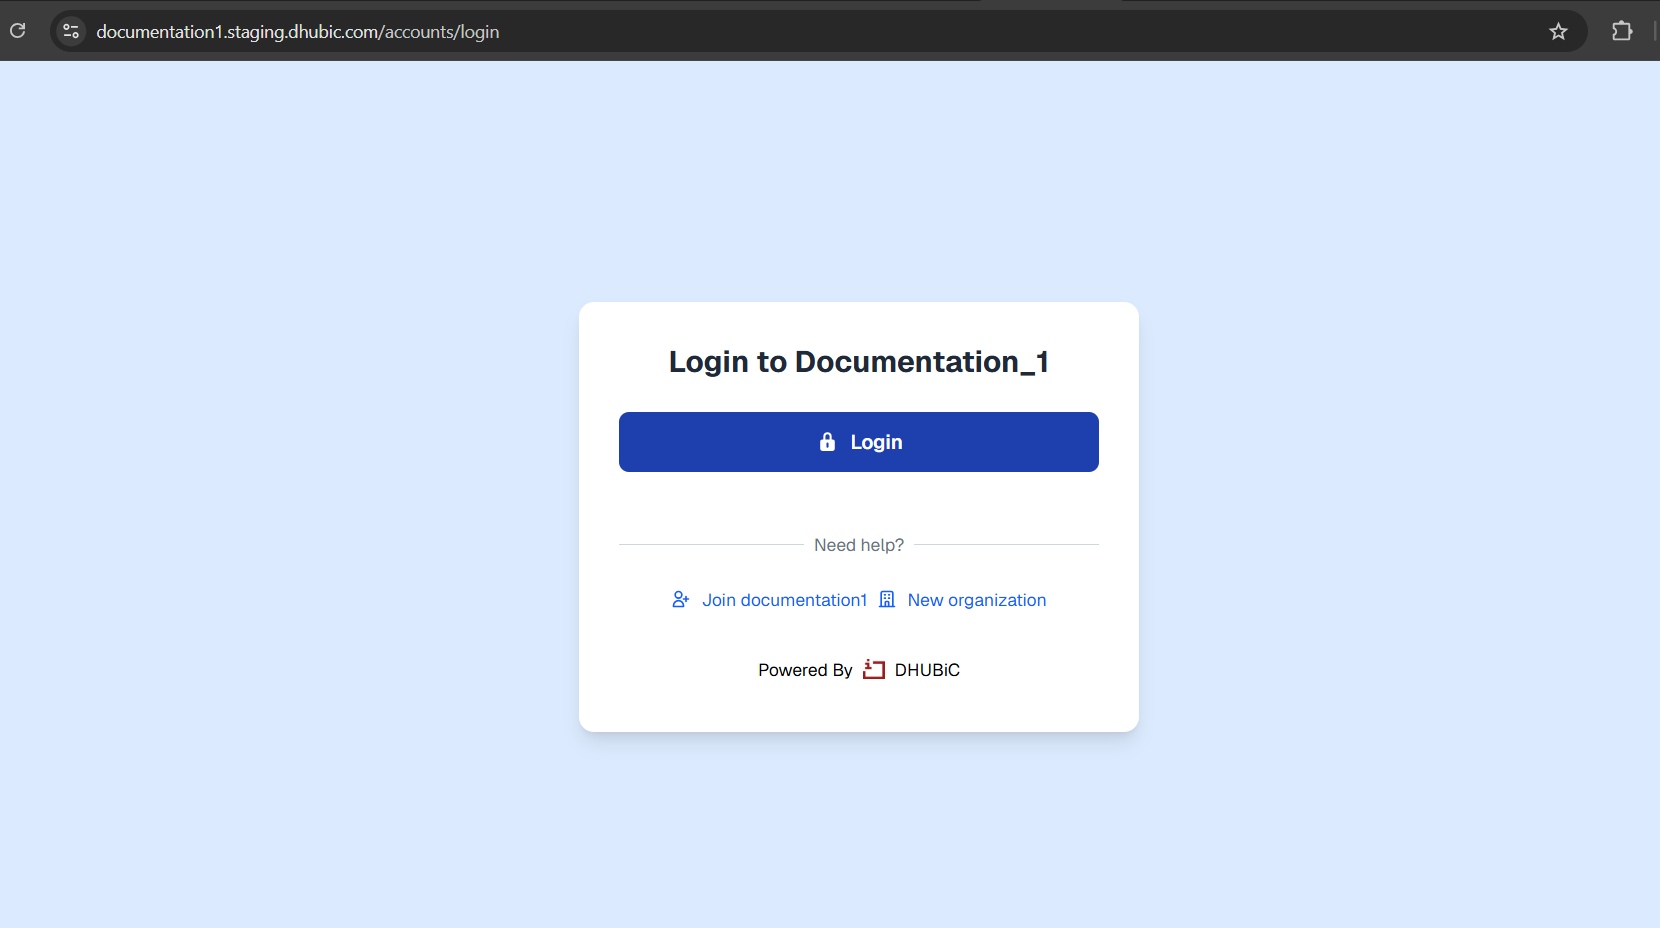
You are redirected to your custom workspace access page. Click the blue Login button in the center card to initialize the authentication workflow.
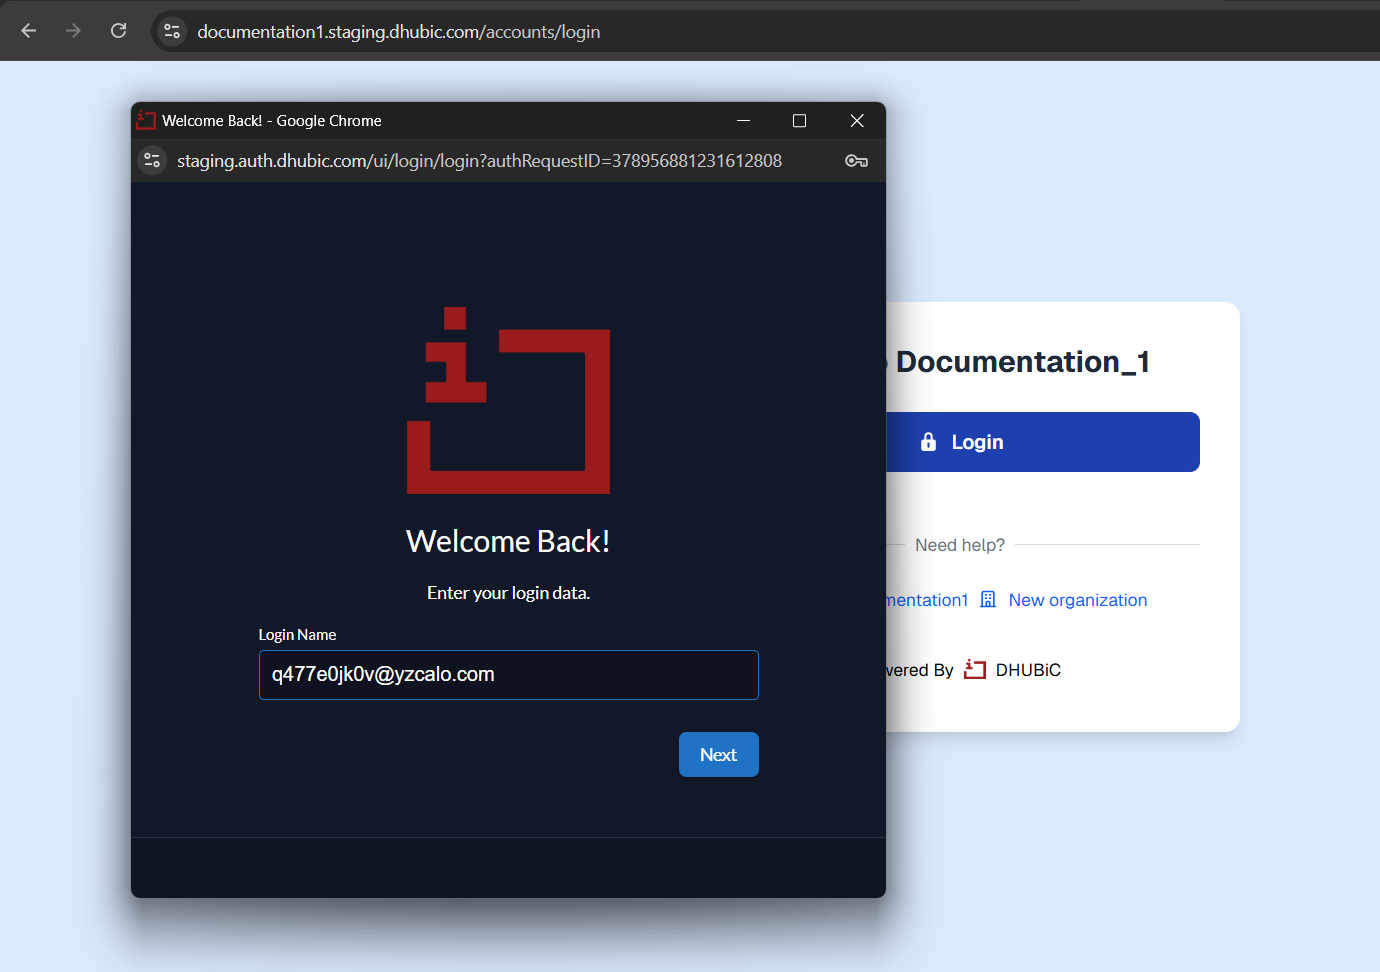
An authentication window pops up. Type your registered email address into the Login Name field and click Next.
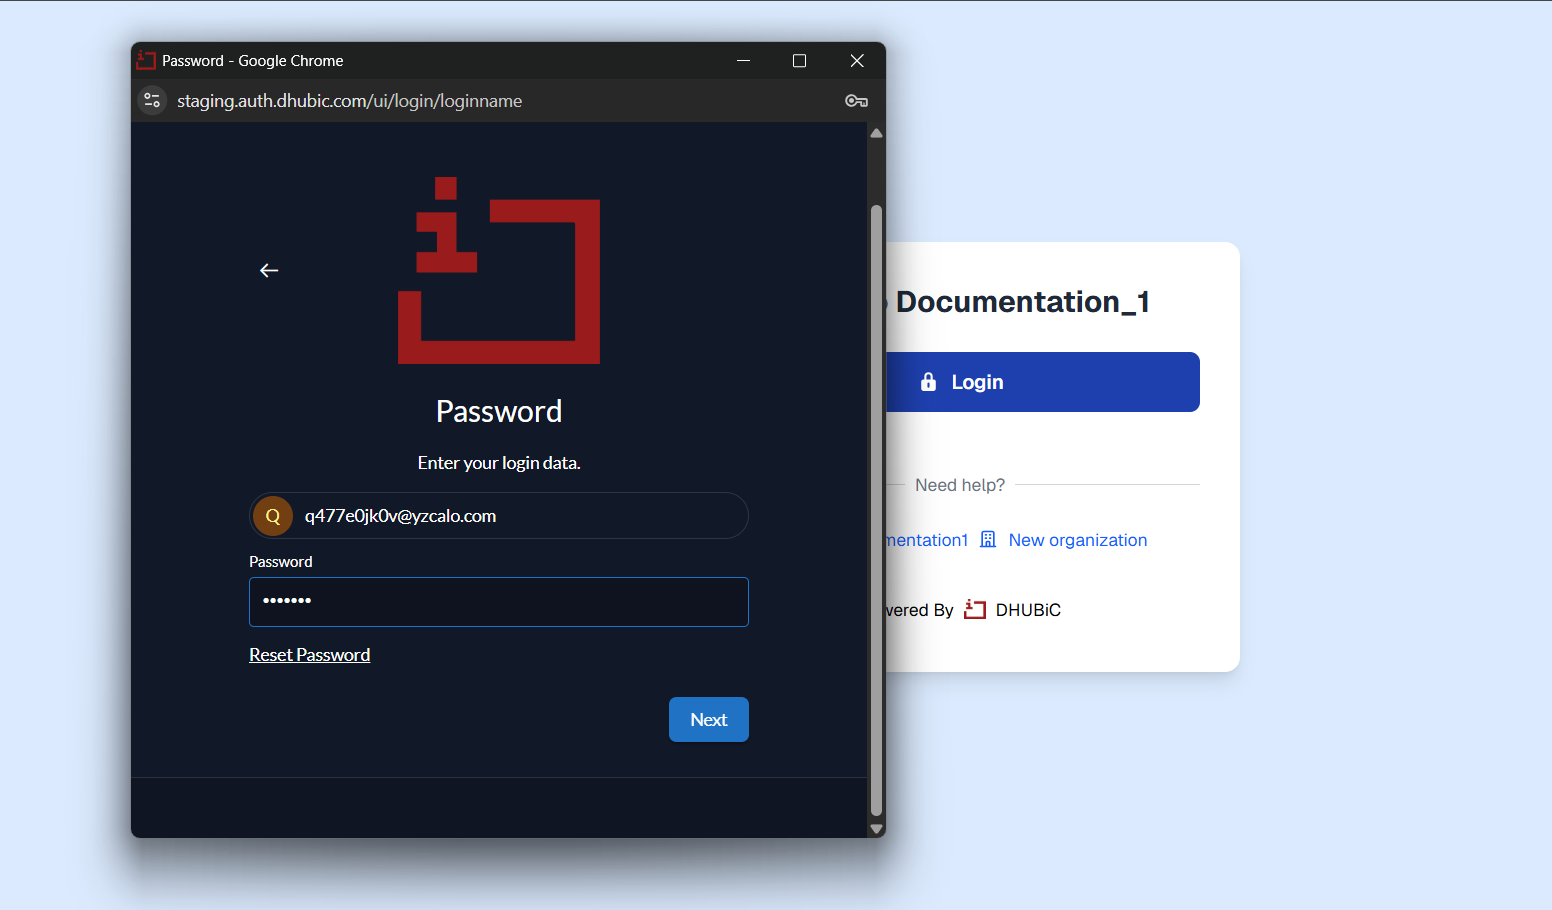
Type your account password into the Password field and click Next.
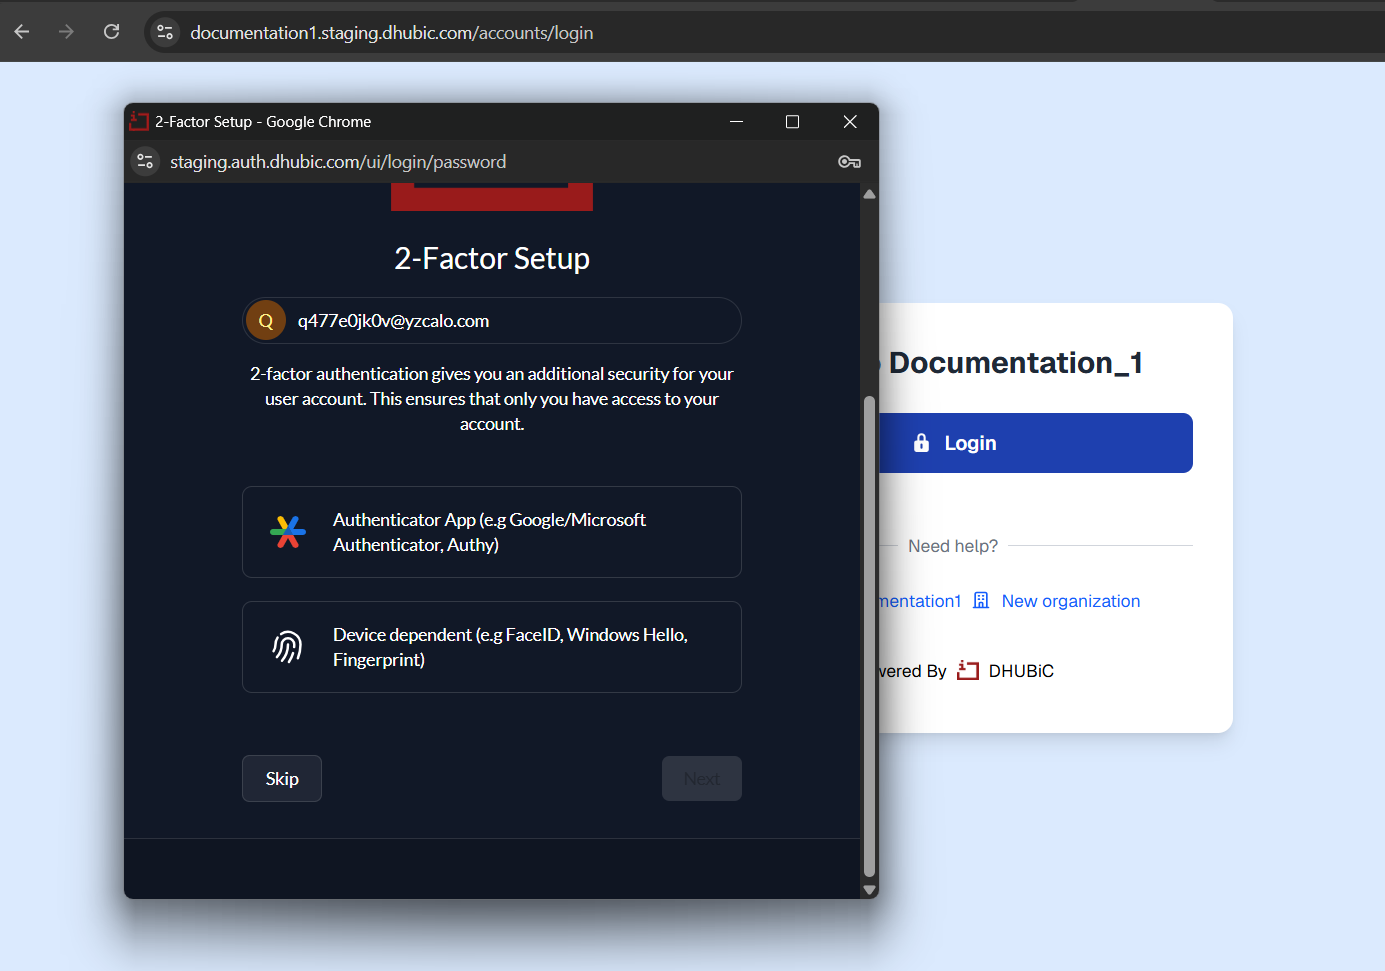
To secure the new workspace administrator account, choose an additional identity verification system:
Alternatively, click Skip to defer configuration for a later session.
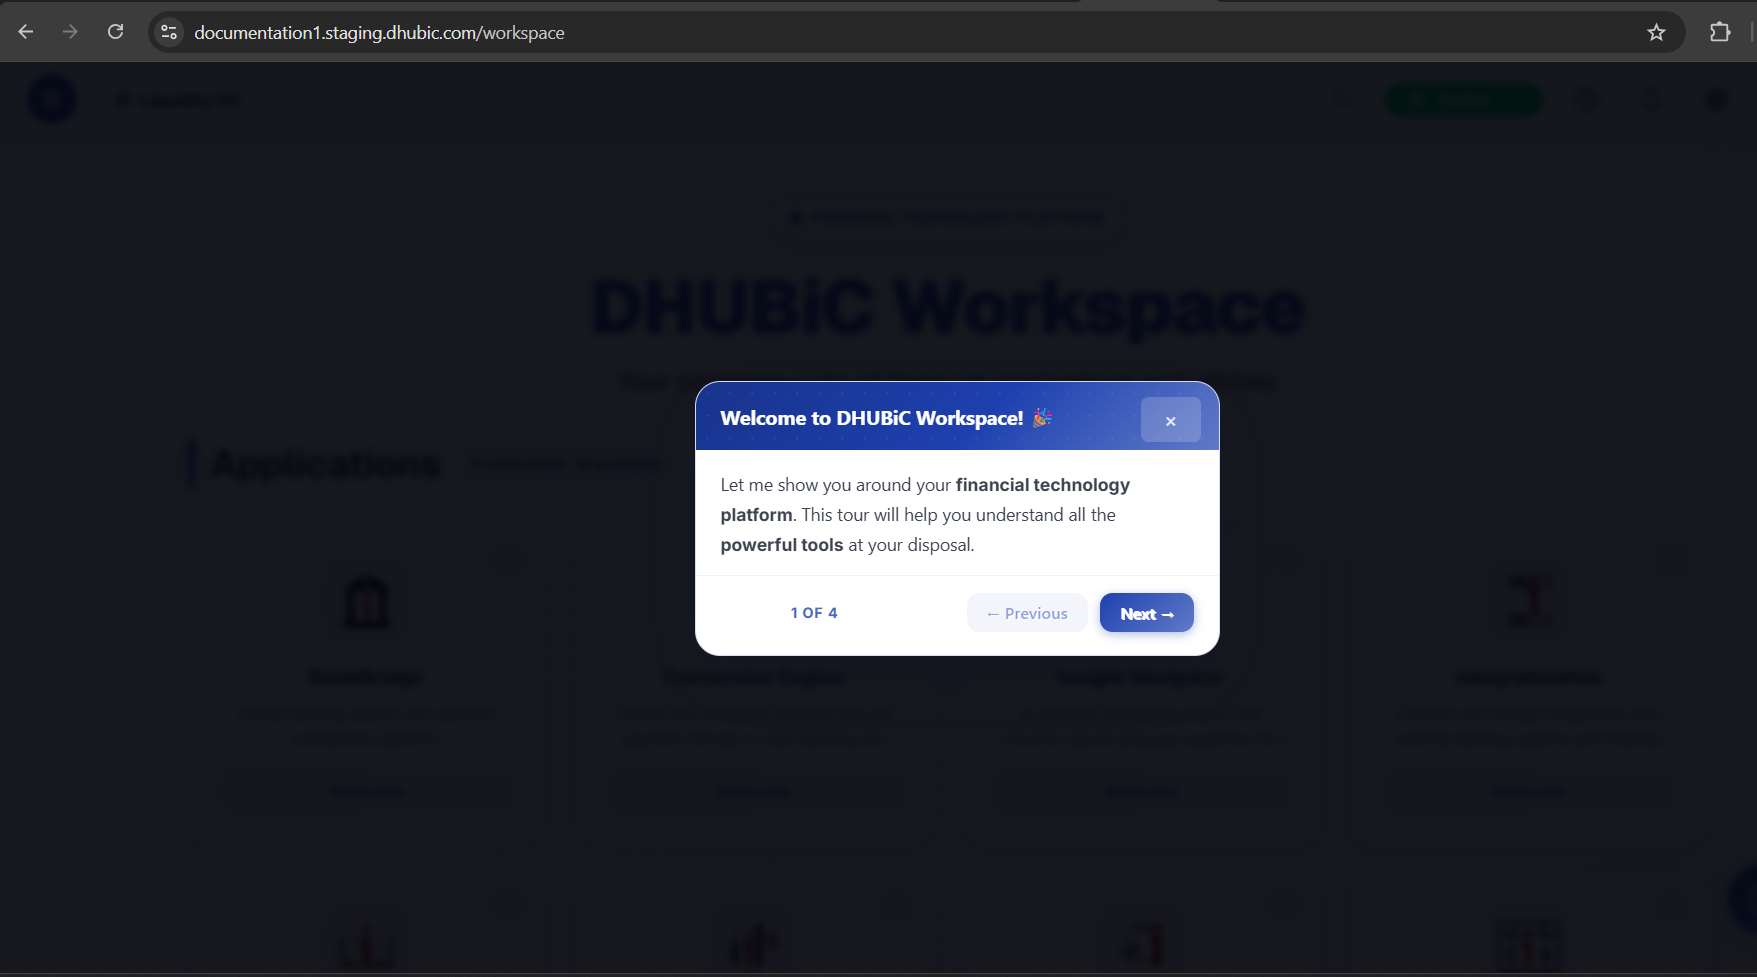
Upon logging in for the first time, you are redirected to the main dashboard. A 'Welcome to DHUBiC Workspace!' onboarding modal will automatically appear to guide you through a 4-step interactive tour of the platform's features. Click Next to step through the overview, or click the X button to skip the tour and go straight to the interface.
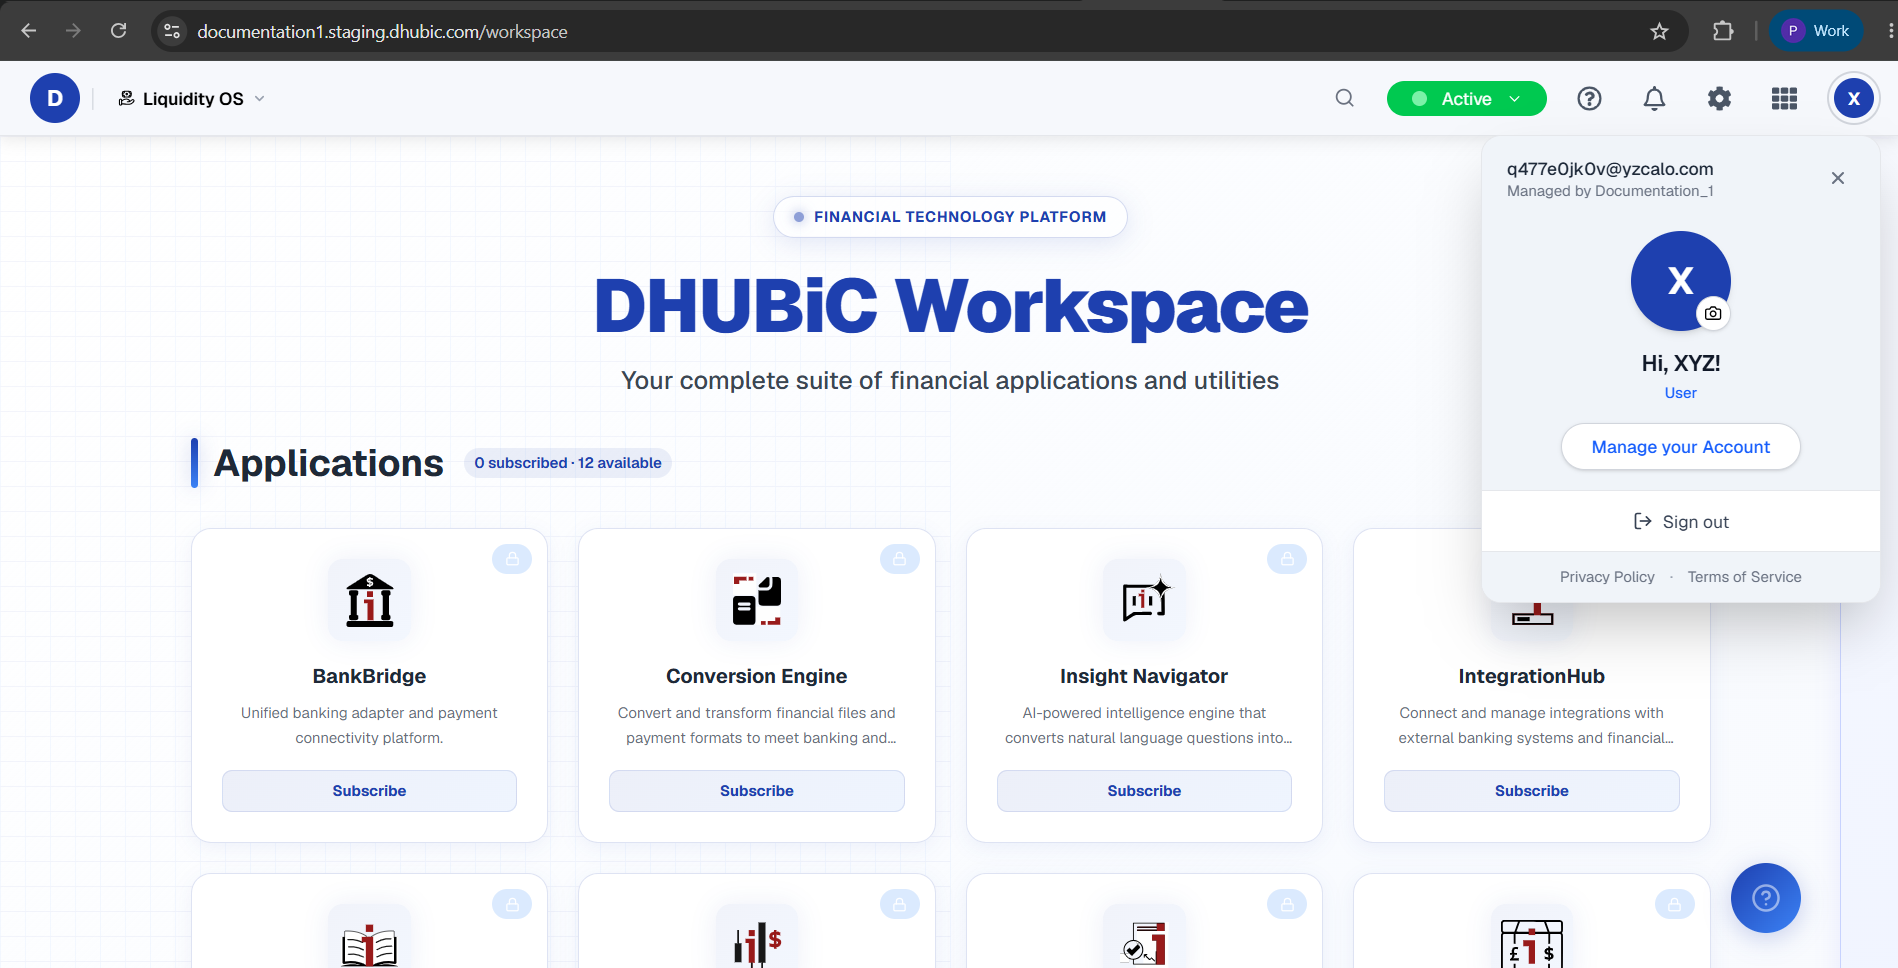
The dashboard loads completely with your selected theme styling applied. From this central portal, you can view all available financial applications (such as BankBridge, Conversion Engine, Insight Navigator, and IntegrationHub) and manage subscriptions.
To check account status or sign out, click the profile avatar circle in the top right corner to open the user options drawer, where you can click Manage your Account for deeper administrative control.
You have successfully created your new workspace on the DHUBiC platform. You can now add users from settings and subscribe to different apps and services.